Did you purchase a piece of artwork at the recent TD Art Gallery Paint-In? Or perhaps you have framed canvases sitting on the floor of your home waiting to be hung. We have a few good tips for hanging your favourite art pieces!
1. Finding the right space
Finding the perfect spot is the most important first decision to make. Apart from it looking good, there are also a few practical considerations, including how well the artwork will thrive in the proposed spot. If the wall gets a full blast of afternoon sun, the artwork might suffer from fading and sun damage with time. Art on paper will likely not thrive very well either in a damp environment like a bathroom with the likelihood of wrinkling or foxing. Hanging artwork too close to a radiator or fireplace might cause heat damage to the artwork.
2. Sizing and scale
Unlike an art gallery where the large empty spaces create the perfect backdrop to the art, it’s wise to consider the space in which you plan to hang the artwork and the furniture and items around it. Finding the right scale is important to highlight the artwork. For example, if the picture is going above a sofa, the picture should not be wider than the sofa. About 2/3 width of the furniture is ideal.
3. What’s the right height?
Generally speaking, artworks should be hung at eye level. Museums and galleries often follow the rule of thumb that the centre of the framed picture is 57 inches from the ground. If you are hanging above a piece of furniture, then give it at least 6 inches of spacing above.
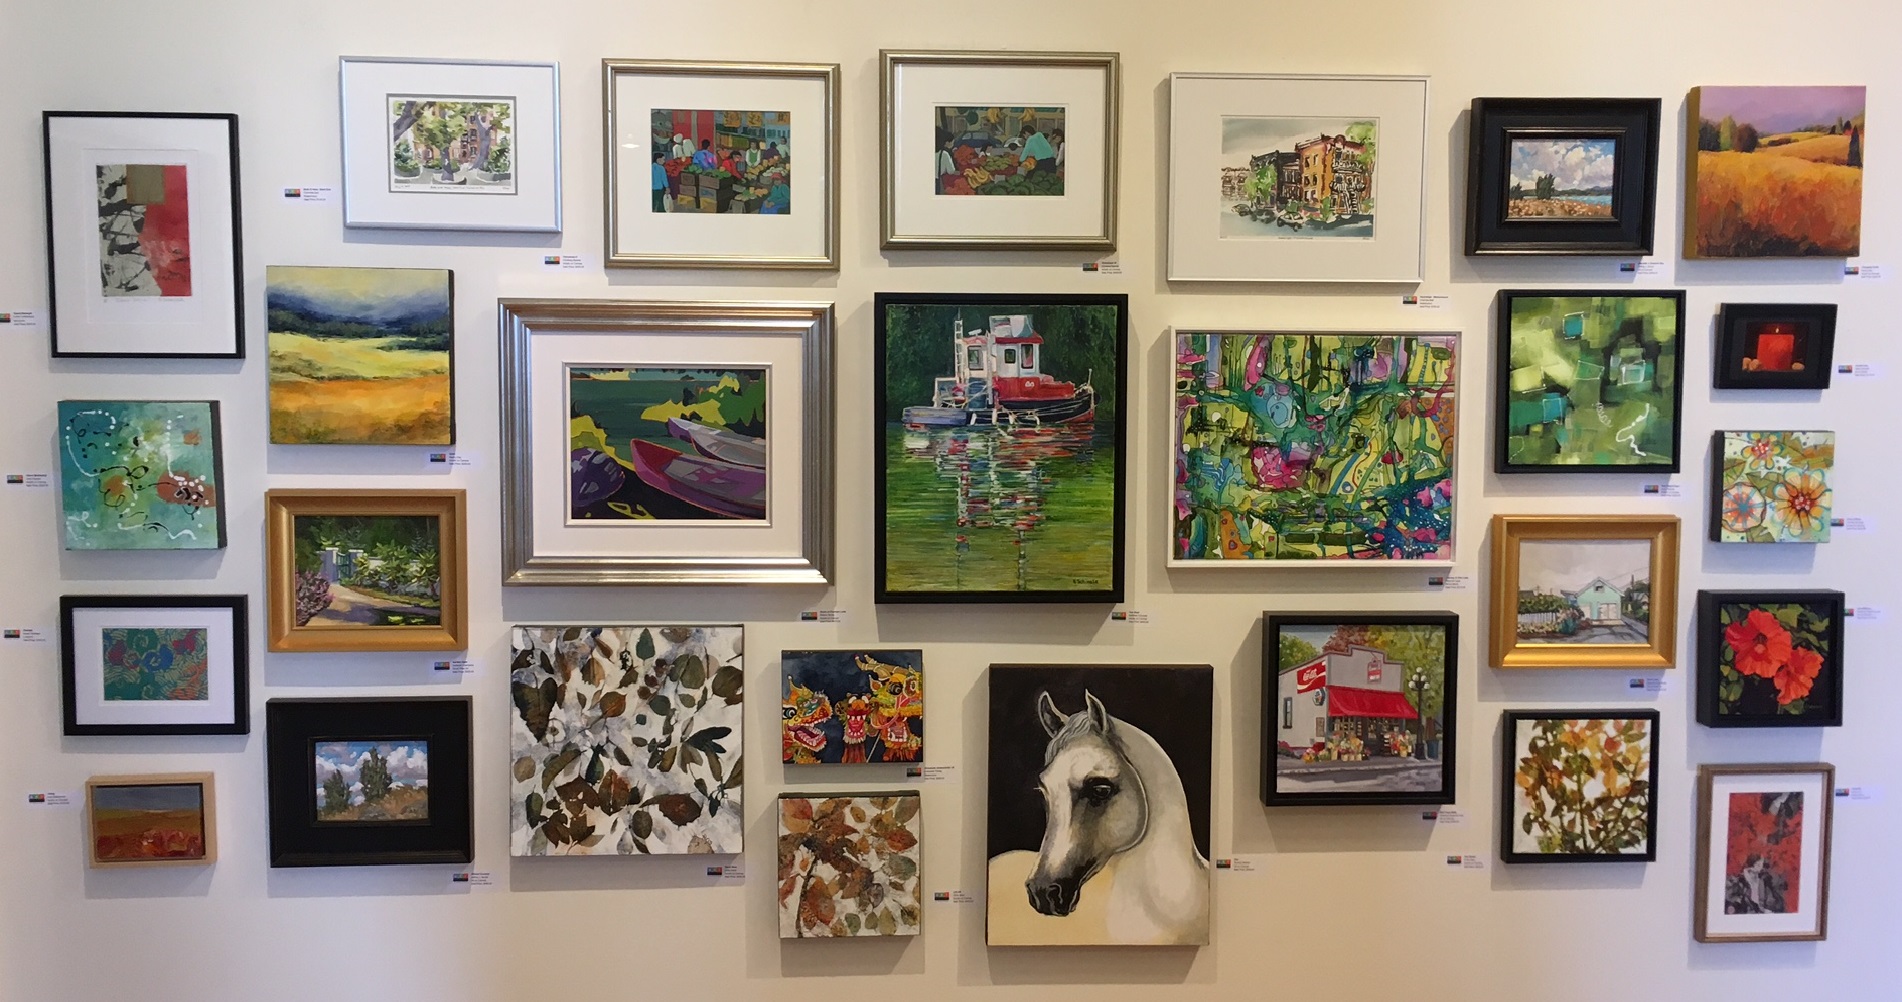
4. Creating a gallery wall
If the game plan is to hang two or more pictures together, then consider the grouping as a whole, rather than as individual hangs. The centre of the grouping should be at eye-level. Plan the arrangement, keeping the same border width between paintings. The border should only be a few inches so that the grouping looks connected.
5. The wall
Always consider the wall – is it brick, plaster, wood, concrete? The hanging tool you use must be compatible with the material of the wall. Or, you could spare your wall and go with a picture rail that runs the width of the wall close to the ceiling. All you would need then is hooks and wire. This is a great option if you plan to change the artwork regularly. You can see what picture rails look like in an art gallery.
6. Gather your toolkit
What’s in your picture hanging toolkit? Measuring tape, pencil, hammer, stud-finder, the appropriate type of hook for the wall.
7. Weighing things up
For lightweight pieces, small nails will do the job. Picture-hangers are best for pieces that weigh under 4 or 5 kilograms. For heavier pictures, you might need to hang from the stud or use anchor plugs and bigger nails. Always check the back of the artwork to see what hanging hardware it comes with.
8. “X” marks the spot
Before you hang the thing, have someone else hold it up so you can see it’s in the right spot! Mark an X with your pencil where the nail is going to go. This must line up with the hanging hardware on the back of the frame. To do this, determine where the centre of top edge of the frame will be, then measure down to the hanging hardware.
9. Lighting
Don’t forget to shine a light on your most important pieces!
10. Other ways to display art
Rules are meant to be broken! If hammers and nails are not your thing, you could lean the picture against the wall on a shelf, mantelpiece or console. Prop it up on an easel or even against the back of a chair.
Happy hanging!